My New Dehydrator
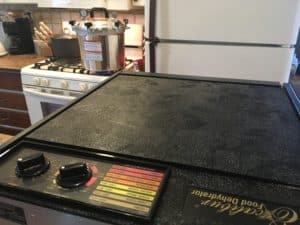
I bought myself a new kitchen workhorse this summer: an Excalibur 9-Tray Food Dehydrator. We have been dehydrating some things for several years – my husband makes venison jerky a few times a year, and I’m a big fan of homemade banana chips.
Last year, in an attempt to get more nutrient-rich beets in my diet even though I detest them, I even made some beet powder.
 It was an exciting year in my world of food preservation equipment because my mom surprised me with a new All-American canner last Christmas too! I had been ogling that baby for a few years, let me tell ya’. You can see her in the background of this photo.
(This post isn’t a paid advertisement for Excalibur. I purchased the dehydrator for myself this summer, and I am using this post to share about how I have used it so far and what I like about it.)
What We Replaced
Before this year, we had an older-style Nesco dehydrator with round trays. It worked fine, but it didn’t have a fan in it and it took things quite a while to dehydrate. We also always had to rotate the trays to ensure even drying of our product(s). Nesco has a newer model now that also has a fan.
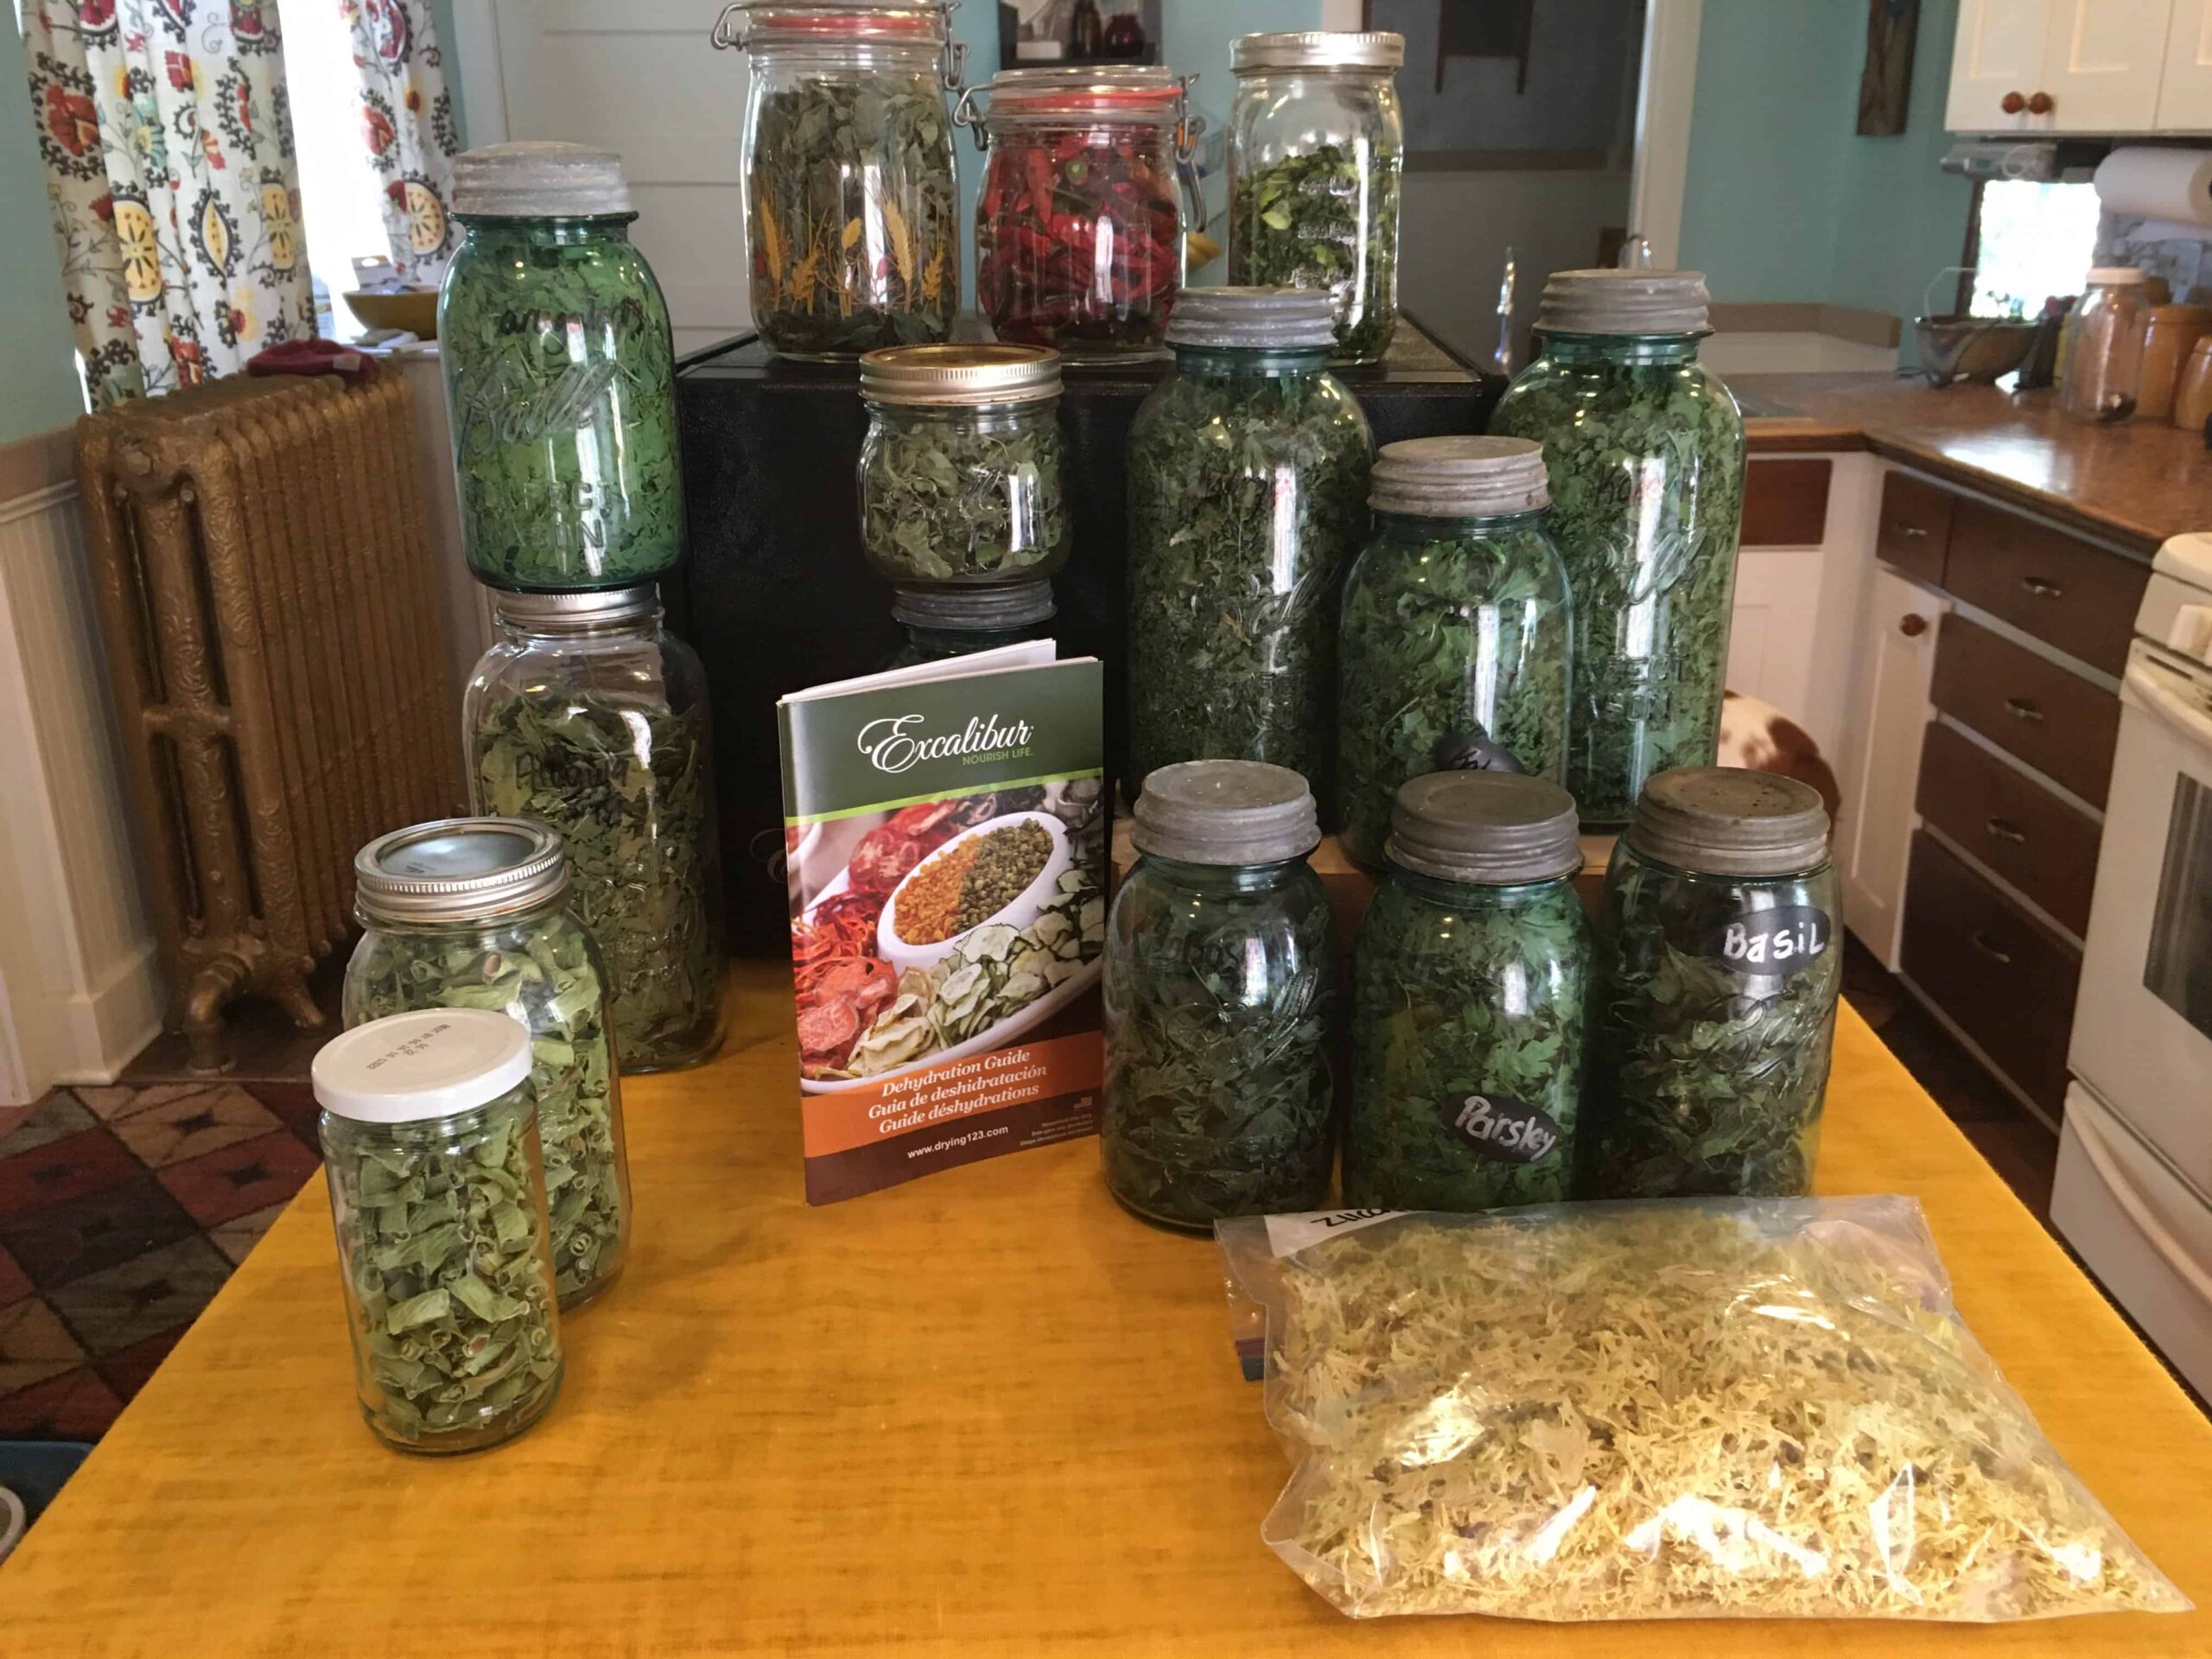
Anyway, the Food in Jars Mastery Challenge category for October was “Wild Card” – so I’m using this opportunity to tell you about all of the things I dehydrated in my fun new toy in September and October.
I’m a member of the Dehydrating Tips & Tricks group on Facebook, and the admin there is great about sharing deals as she finds them. She shared a deal on the Excalibur 9-Tray Food Dehydrator this summer that I just couldn’t pass up, so I called it an early birthday present and clicked “Buy.”
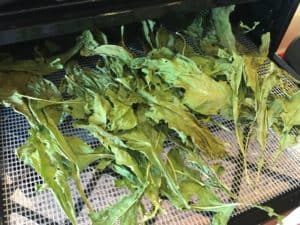
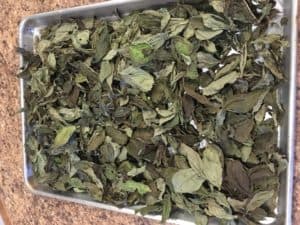
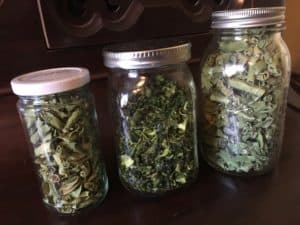
Arugula and Kale
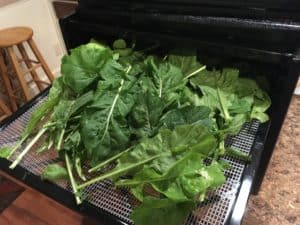 The first things I dehydrated were arugula and kale from our garden. I had dehydrated both of these greens last year, and we used them in soups and other meals throughout the winter and spring. So, I made some more.
 I like how the Excalibur has a temperature dial so you can use the low temperature for herbs and other greens, medium temperature for fruits and vegetables, and higher temperature for meat. The dehydrator came with a really nice booklet that has recommended times and temperatures for a variety of things, so that’s really helpful too.
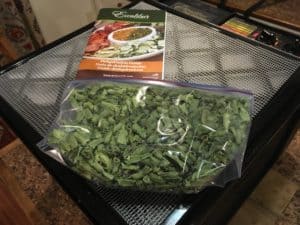
Basil
 I also dehydrated a batch of basil, because if you clean it up and pick a bunch of it mid-summer, it will branch out and grow more. And who doesn’t want more basil?
 It works well for dehydrating greens and herbs, but towards the end when they are almost done, the fan does start to blow some of them around a bit.
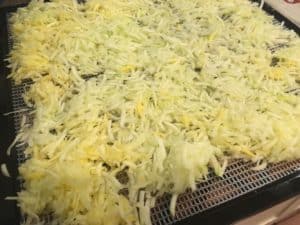
Zucchini
Next up, I took a bunch of shredded zucchini and layered it on the trays. Each tray came with a food-grade mesh mat, so finer things wouldn’t fall through. These are helpful to have. The zucchini was a little bit of a pain. It got kind of stuck to the mats and had to be peeled off.
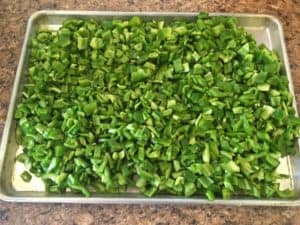
Green Peppers and Green Beans
I also dehydrated a couple of things for my mom. She makes a lot of soup in the winter, so we diced a bunch of green peppers for her and also chopped a bunch of green beans.

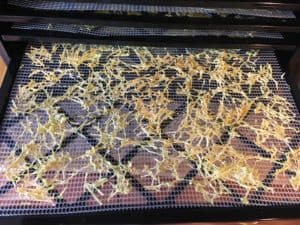
Chili Peppers and More Herbs
I dehydrated some chili peppers, and some more herbs – more basil, and sage, parsley. thyme, and rosemary. Then I dehydrated more kale and arugula. I’m pretty sure there was a month in there between September and October where the dehydrator was just running all the time.
A Few Notes about Dehydrating
It is kind of a large piece of equipment, it takes up quite a bit of room on the counter. I did notice when I did the green peppers and green beans, since the temperature dial was a bit hotter for those than with the greens and herbs, that the bottom of the machine did get a bit warm. Just to be sure, I put a wooden cutting board underneath it. I’m sure it was fine, but it was easy enough to put the board underneath it.
When I dehydrate things, I am always amazed at how small they get. An entire dehydrator full of shredded zucchini didn’t even fill up a gallon freezer bag. An entire dehydrator full of green beans filled up not quite 2-quart jars. It’s crazy!
If you dehydrate things fully and properly, they are shelf-stable in an airtight jar. You don’t want to store them on the shelf in Ziplock bags, as they aren’t fully airtight and can let air back into the product.
 You will notice in my photos that the zucchini is in a Ziplock. After it came out of the dehydrator, it still felt just a little tacky to me. I decided to store it in the freezer just to be sure it would stay okay. It takes up so much less room than just freezing shredded zucchini, so it wasn’t a big deal to toss it in there. I have read that you can just rehydrate it and use it like normal shredded zucchini – in meals, quick bread, etc. I have still had fresh zucchini to use from the garden, so I haven’t tried any of the dehydrated stuff yet.
Conditioning your Dehydrated Foods
 One important note about dehydrating is a step that I actually didn’t learn about until recently. Once you deem your newly dehydrated goods done, you need to condition them. This involves simply putting the dehydrated food into a freezer bag for a day. After a day, you open the bag and confirm the food feels as dry as it did the day before.
 If it’s herbs or greens and they don’t feel as crisp, or a fruit or vegetable that doesn’t feel as dry or feels tacky to the touch – these things mean that they need more time in the dehydrator. After all this work, you definitely don’t want to put your dehydrated goods into an airtight jar too soon and open it later to find mold.
You can read more about this process over at The Purposeful Pantry.
There are some things you can do to protect your dehydrated goods for longer-term storage, too. You can get a Food Saver Vacuum Sealer or a Handheld Version, and combine it with the Mason Jar Attachments that will help make the contents of the jar more airtight. An alternative option is to use Silica Gel Desiccant Packets inside your jars. I actually haven’t done any of these things yet, but I need to learn more about them and start using one of these methods.
The County Fair
 I always enter some jars of my canned items in the county fair, just to see what I might win. I got my very first purple ribbon this year for my Low-Temperature Pasteurized Garlic Dill Pickles. That was really exciting! I entered some other jams and sauces, and jars of dehydrated arugula, kale, and basil. At the time of the fair, those were the only three things I had dehydrated. Much of the dehydrating madness continued after the fair was over.
What’s Next?
It’s hunting season right now here in Minnesota. Usually, when we get our new deer, we make a batch of jerky out of the venison that is left in the freezer. I’m excited to see how the Excalibur makes jerky compared to our old dehydrator.
I’m not sure what else! I’ve seen some really pretty dehydrated strawberries that some people have made, and haven’t made banana chips in awhile. I guess you could say I’m happy with my purchase!
For more blog posts like this one, click here.
Frequently Asked Questions
What foods can be dehydrated at home?
You can dehydrate a wide variety of foods, including herbs, leafy greens, zucchini, peppers, green beans, fruits, and jerky. Dehydrating is a great way to preserve garden produce and reduce food waste.
How should dehydrated foods be stored?
Properly dehydrated foods should be stored in airtight containers, such as glass jars, to keep moisture out and maintain freshness.
What is conditioning dehydrated food?
Conditioning is the process of placing freshly dehydrated food in a sealed bag for about a day to check for any remaining moisture. If the food softens or feels damp, it needs more drying time before storage.
Can dehydrated vegetables be rehydrated for cooking?
Yes. Dehydrated vegetables can be rehydrated and used in soups, casseroles, baked goods, and other recipes, making them a convenient pantry staple.
Why choose dehydrating as a food preservation method?
Dehydrating helps preserve seasonal produce, saves freezer space, reduces food waste, and creates shelf-stable ingredients that can be enjoyed throughout the year.