If you are like me, you love your garden and all of its bounty, but by the time it’s peak harvest season, it can get a bit overwhelming. I’m a canner at heart and love water bath and pressure canning like so many of you, but I’ve recently found a new love for dehydrating.
I live in Minnesota, and our growing season is short though productive, which means a LOT of work has to be squeezed into a few months. Pair that with the fact that my 1880 Victorian home doesn’t have central air conditioning, and sometimes, the idea of running the stove burners for hours at a time just isn’t very appealing.
Dehydrating is Great for Several Reasons
- It’s easy! For the most part, you must wash and chop your vegetables, fruits, or herbs and put them in the dehydrator. However, you do need to blanch some of the vegetables before dehydrating. A general rule of thumb is that if you would normally cook the food before eating it, you should consider blanching it before dehydrating it. This isn’t a safety concern, but it can affect the texture and desirability of the final product.
- It saves SO much space! I put 32 cups of shredded zucchini in my dehydrator, and when it was done, it fit into a 1-gallon freezer bag. This is just one example!
- It is energy-efficient! The book that came with my Excalibur 9-Tray Dehydrator says it costs 3 to 6 cents per HOUR to run it. That’s it! It also doesn’t heat up the house, which is crucial for me in the summer months.
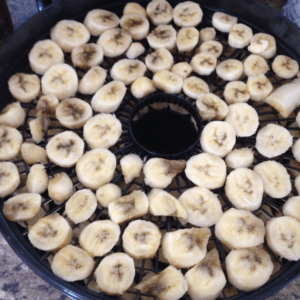
- It saves money! Not only can you preserve the foods harvested from your garden quickly and easily, but you can also keep your dehydrator in mind while shopping at the grocery store. Are they selling a large bag of overripe bananas for a few bucks? They make great banana chips!
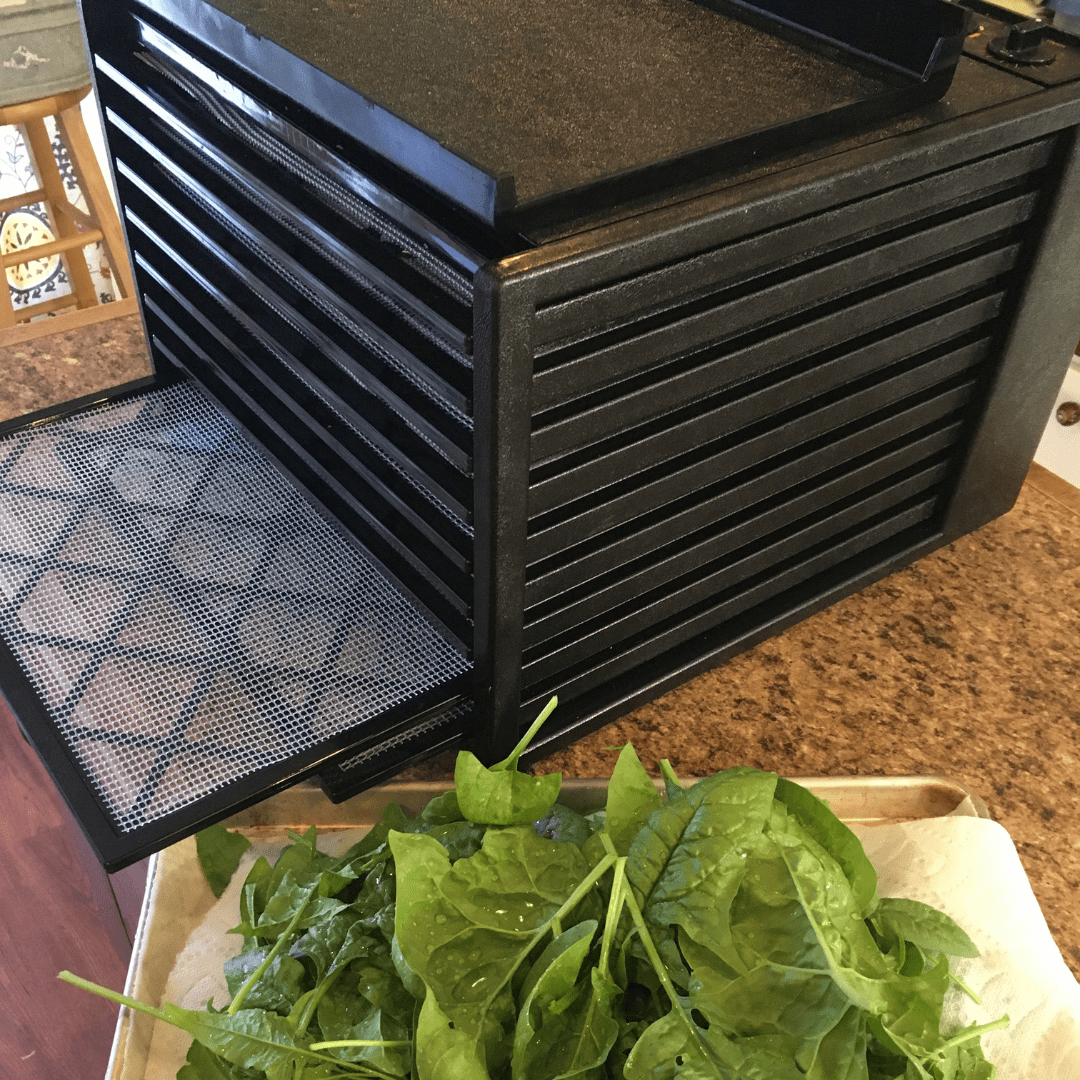
- It is healthy! Dehydrating allows you to preserve your garden harvest quickly. When I dehydrate my greens and herbs from the garden, I literally pick them, wash them off, chop them, and put them in the dehydrator. As we all know, nutrients fade from produce over time, and you can’t get it preserved much quicker than that.
The Equipment
Until this year, my dehydrator was an old round Ronco brand without a fan or temperature dial. You had to rotate the trays every few hours to ensure even dehydration. We mainly used it for venison jerky and banana chips.
Though our old dehydrator worked ok, it was actually about to break completely in half. Also, I was interested in expanding my dehydrating experience beyond jerky and banana chips. This summer, I found a really great flash sale and replaced my old dehydrator with an Excalibur 9-Tray Dehydrator. Happy Birthday to me! After that, I went a little wild and dehydrated all kinds of things .
Important Dehydrator Features
If you don’t have a dehydrator and will be purchasing one, I recommend selecting one with a temperature dial and a fan. A timer is also a nice feature, but not crucial. If an Excalibur isn’t in your budget to start with, that’s ok! There are less expensive options that work well, too, like this Nesco Gardenmaster Food Dehydrator.
The temperature dial is important because different foods should be dehydrated at different temperatures. For example:
- Herbs – 115 degrees (Fahrenheit)
- Greens & Vegetables – 125 degrees
- Fruits – 135 degrees
- Jerky – 165 degrees
After using my new Excalibur, I was so amazed at the bright color retained in my greens and herbs compared to products dried in my old dehydrator. You can see why that would be the case once you look at the temperature differences required for each category. In my old one, I was dehydrating herbs and jerky at essentially the same temperature!
The fan is also an important feature, because it helps to retain even drying time throughout your trays. Again, with my old dehydrator, I always had to rotate the trays to try to get things done evenly. The fan lets you set your trays in place with your product on them, set a timer, and basically forget it and let it do its thing.
How a Food Processor is Helpful
Another piece of equipment you may want to consider purchasing (if you don’t already have one) is a food processor . This is an essential tool if you are planning to make powders with your dehydrated foods—think beet powder, vegetable soup base, chicken bouillon, etc.
Things to Dehydrate
So, the options are quite endless in terms of what you can dehydrate. Fruits, vegetables, greens, herbs, jerky, fruit leather, yogurt, sourdough starter, the list goes on!
Fruit
- Banana chips are by far my favorite thing to dehydrate. They are SO much better than the ones you buy in the store. I also like to chop them up and use them in baking, specifically banana nut bagels.
- Lemon and orange slices are great for water and tea, but they can also be used in marinades and sauces.
- Tomatoes are a bit tricky to dehydrate because they have SO much moisture in them. It is possible, though! A lot of food preservationists actually take their tomato peelings and seeds from their salsa and sauce-making and dehydrate them! Once dehydrated, you can grind them in your food processor, and you have some killer tomato powder to mix into your cooking. Another idea for tomatoes is to marinate them in oil and seasonings and then dehydrate them. Due to the oil, they aren’t shelf-stable and have to be frozen after dehydrating, but we love them on salads.
 Herbs & Greens
- Arugula & Kale—I love dehydrating greens. We use them throughout the winter in soup and other dishes. We don’t grind ours into powder; we just crush it as we use it. But you could use your food processor to make green powder to incorporate into various things. Swiss chard would also work well, though we usually end up eating all of ours fresh before there is a surplus left to dehydrate.
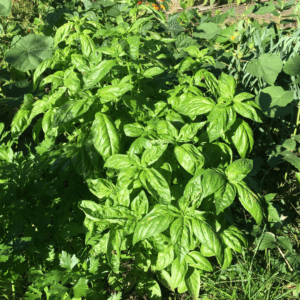
- Herbs—We usually grow a variety of herbs in our garden. I used to air-dry them, but this year was the first time I officially dehydrated them. What a difference! The color remained beautifully green, and their flavor was amazing.
 Vegetables
- Mushrooms – Good mushrooms are hard to find in my small-town grocery store, so I always have sliced and dehydrated mushrooms on hand. I actually store mine in the freezer because I am never fully confident that they are fully dehydrated. They are kind of weird, like tomatoes. But I can dehydrate a machine full of mushroom slices and fit them into a 1-gallon bag for freezer storage. That’s a pretty amazing space-saver if you ask me!
- Shredded zucchini – I dehydrated shredded zucchini for the first time this summer too. I’ve read that you can rehydrate it and use it in baked goods, just like regular shredded zucchini. I am excited about how much space this saved in the freezer and look forward to trying it in some bread.
- Green beans – I dehydrated green beans for my mom this summer so she could use them in soups. I actually did not blanch them first and apparently should have. Even once we rehydrate them before using, the texture is kind of weird. I would try this again though and blanch first.
- Peppers – I dehydrated diced green bell peppers this year to be used in chili. I also often dehydrate various hot peppers to be ground into pepper flakes and chili powder. My husband and I smoke large batches of serrano peppers yearly and finish them off in the dehydrator. They are our favorite!
- Beet Powder – I don’t really care for beets, but I wanted to sneak them into more things due to their health benefits. I dehydrated beet slices and used my food processor to make beet powder.
- Vegetable Powder—You can use the same process I used in making my beet powder for really any variety of vegetables—mixed vegetables, vegetable scraps even! Anything you would throw into a vegetable soup can be dehydrated and then turned into powder in your food processor. It’s a really easy way to “sneak” more vegetables into your cooking.
Other
Here are some other ideas for dehydrating less obvious things. To do these things, you need to purchase sheets to line the trays of your dehydrator. Some examples of these would be the Excalibur Silicone Dehydrator Sheets and Nesco Fruit Roll Sheets for Dehydrators.
- Fruit Leather
- Yogurt
- Sourdough Starter
- Bouillon / soup base
Conditioning your Dehydrated Goods
One really important step to dehydrating food is that it needs to be conditioned after it is dehydrated. In the week after your food is dehydrated, you must ensure no moisture is gathering in the jar. Simply put your newly, fully dehydrated product into an airtight container, and shake and monitor it daily.
If you see moisture gathering anywhere inside the jar, the product needs to go back into the dehydrator. After a week or so, if no moisture has gathered and the product feels and looks as dry as when it went into the jar, you can proceed with longer-term storage. Unfortunately, if at any point anything in the jar displays mold, the entire jar must be tossed.
Storing your Dehydrated Goods
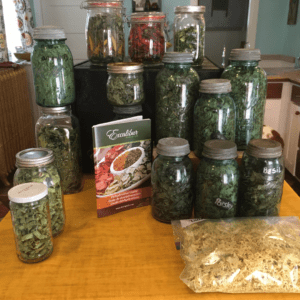
For long-term storage of your dehydrated goods, you want to be sure you store them in an airtight container. Mason jars work well, but I save glass jars from commercial products to not “waste” my canning jars on dehydrated goods. Either way is fine, as long as it’s airtight. Remember that freezer/storage bags aren’t airtight, and neither are most plastic storage containers.
Though I keep most of my dehydrated goods in airtight jars, I store a few things in the freezer. Sliced mushrooms, shredded zucchini, and those marinated tomatoes I mentioned all go in my freezer. This is a personal preference for me – the only thing out of these that really isn’t shelf-stable is the marinated tomatoes.
A few other steps you can take to store your goods:
- Place silica packets in your jars with your finished products. The packets absorb any additional moisture that may be present.
- You can also vacuum seal the jars. There are two types of vacuum sealers you can get – the traditional Food Saver Vacuum Sealer, or more of a Handheld Vacuum Sealer. Whichever option you choose, you can purchase Mason Jar Attachments (which allows you to vacuum seal your dehydrated product into your mason jar.
These extra steps aren’t entirely necessary, so you can do what you are most comfortable with for your family. The most important things are to ensure your product is fully dehydrated and to store it in an airtight container. For this post though, I wanted to give you all of the options for storage!
Reconstituting your Dehydrated Goods
When it comes time to use your dehydrated items, many of the products will be better to eat if you reconstitute them in water first. For example, if you are making soup and drop pieces of dehydrated kale into it, the kale won’t really cook, and it won’t really hydrate. But soak it in some water for at least 30 minutes before putting it into your soup, and the end result is completely different. Dropping it into boiling soup just isn’t the same as reconstituting it slowly in regular water.
Mushrooms must also be reconstituted before use, and this gives you amazing mushroom broth! Shredded zucchini is another example. Before using it in baked goods, it needs to be reconstituted to get that moisture back into it.
Not everything needs to be reconstituted, of course. The arugula and herbs can be easily crushed into your cooking. As you get into it and dehydrate more things, you will learn more about what needs to be reconstituted before use and what doesn’t.
Summary
Thanks for letting me tell you all about dehydrating! If you would like more information, one of my favorite resources is Excalibur.
I’m also happy to answer any questions you may have about your dehydrating journey. You can contact me here.